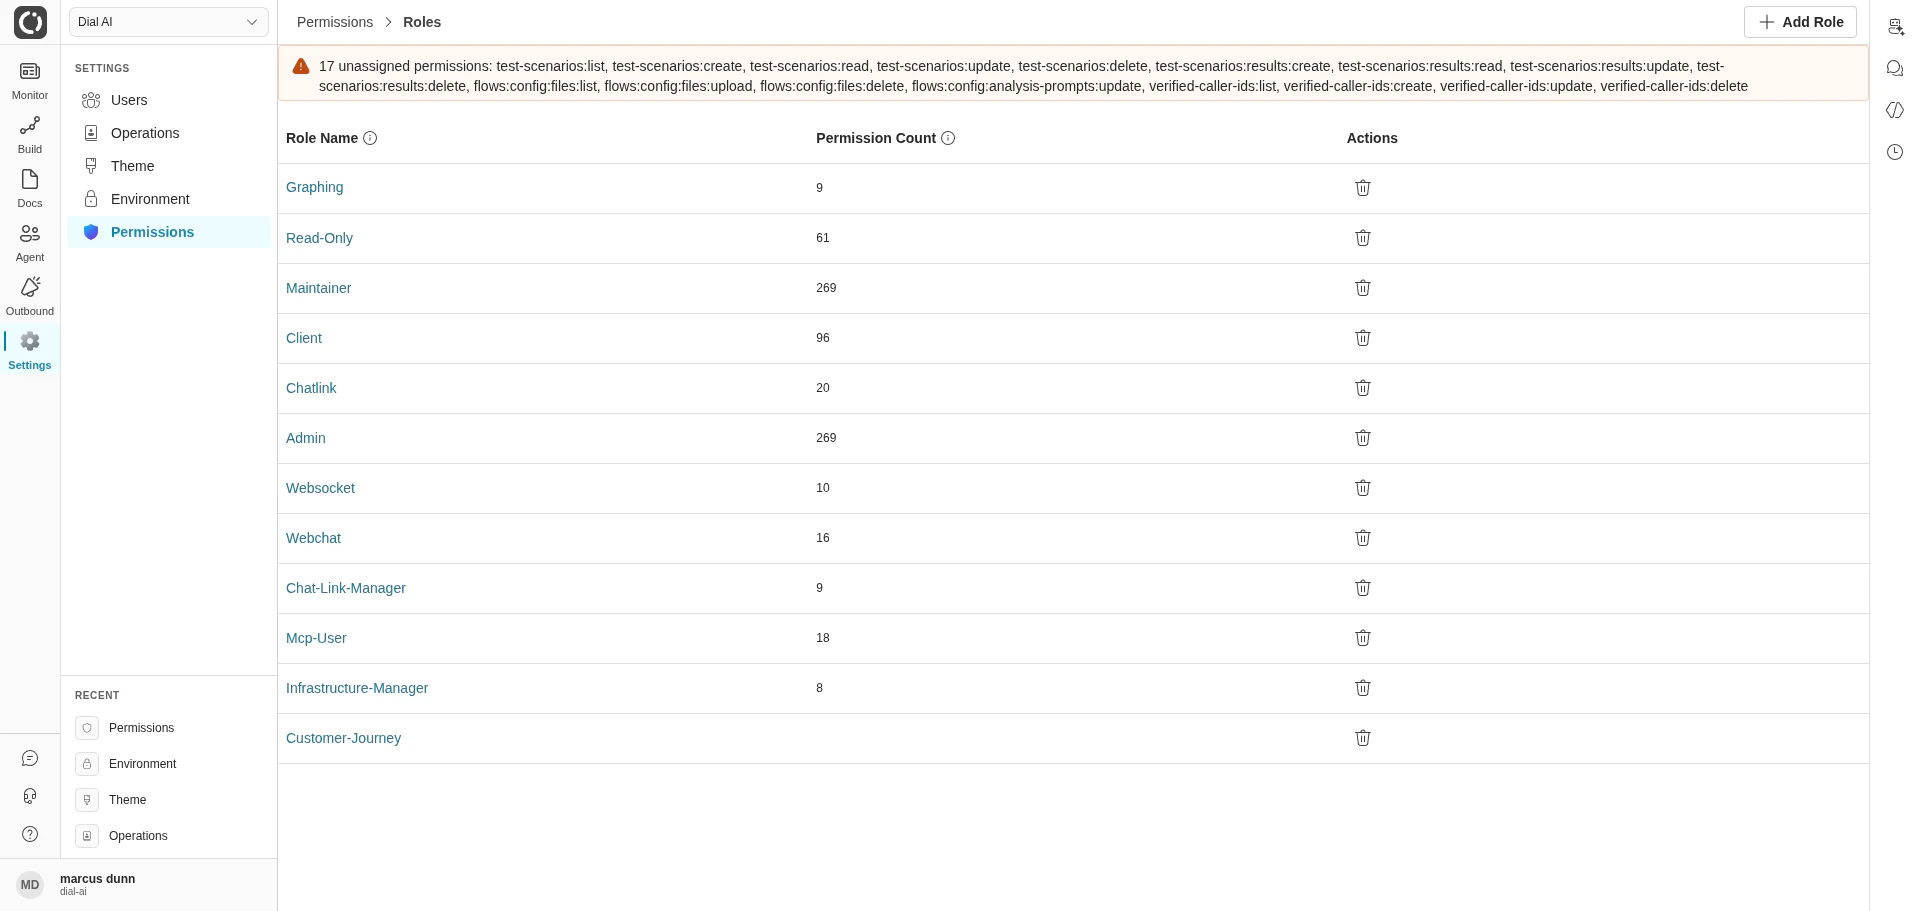
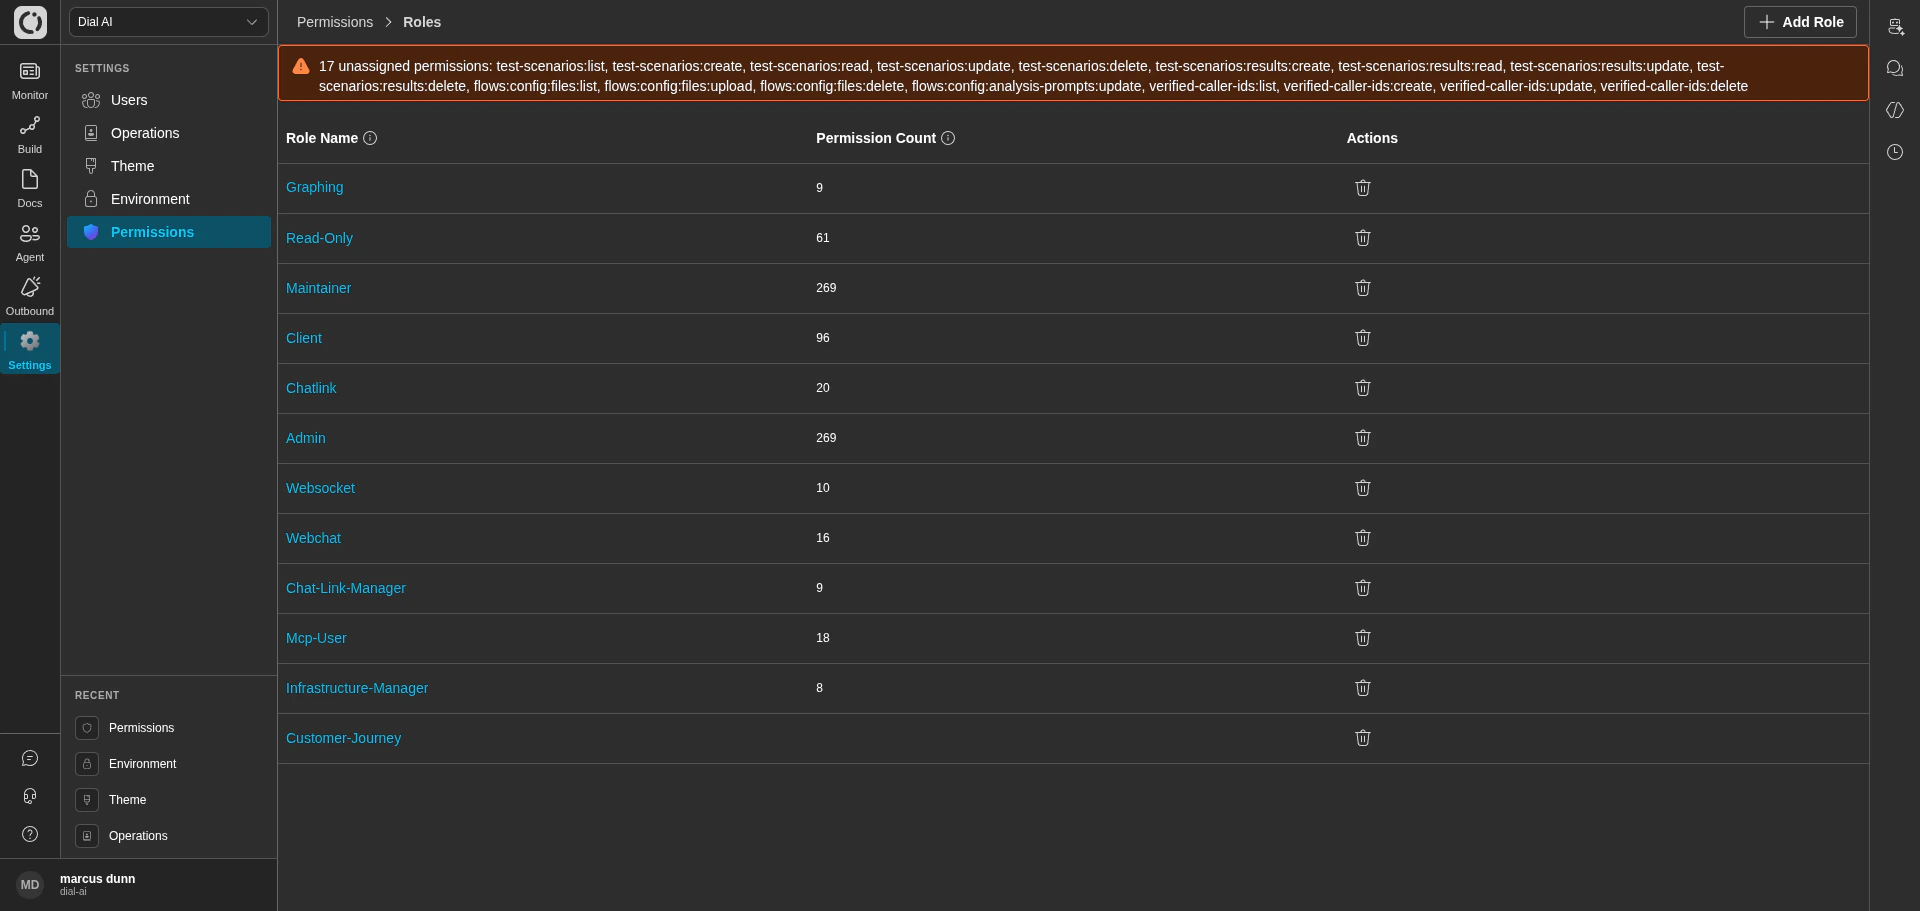
Permissions — the list of roles defined for your tenant
transcripts:read, flows:publish, users:update), and a user’s effective access is the union of every scope on every role they hold.
Accessing Permissions
Navigate to Settings > Permissions in the left sidebar.What’s on the page
The Roles list shows every role configured for your tenant.
Top-right: Add Role opens the new-role dialog.
Unassigned permissions banner
At the top of the page, the platform surfaces any scopes that exist in the system but aren’t covered by any role in this tenant. This banner is your hint that a recent platform update added new permissions — review and assign them to the right roles so the features become reachable.Built-in roles
The platform ships with a starter set of roles. Common ones:
The exact set varies by deployment — your tenant may have additional roles tailored to your organization’s structure.
Creating a role
1
Click Add Role
Opens the role editor.
2
Name it
Pick a name that describes the role’s purpose (e.g., “QA Reviewer”, “Campaign Operator”).
3
Assign scopes
Tick each scope the role should grant. Scopes are grouped by domain (transcripts, flows, channels, etc.) — start narrow and expand as needed.
4
Save
The role is immediately available in the Users page for assignment.
Editing a role
Click a role’s name to open the editor. Toggle scopes and click Save. Changes take effect on the next request for any user holding the role.Deleting a role
Click the delete icon on the role row, then confirm.Deleting a role detaches it from every user who holds it. Those users keep their other roles’ permissions, but lose anything that was granted only by the deleted role. Check the Users page for affected accounts before deleting.
Assigning roles to users
Roles are assigned from the Users page — edit a user, add or remove Groups, save. A user can hold any number of roles; their effective permissions are the union.Scopes naming convention
Scopes follow adomain:resource:action shape. Examples seen across the platform:
transcripts:list,transcripts:read,transcripts:updateflows:config:files:upload,flows:config:files:deletetest-scenarios:create,test-scenarios:results:readverified-caller-ids:list,verified-caller-ids:update
transcripts:read without granting transcripts:update or flows:publish.
Related
Users
Assign these roles to operator accounts.
Personal Configuration
Per-user settings users can adjust themselves.
Environment
Tenant config gated by these roles.